Author:
SAZILI MUHAMMAD
at
Saturday, April 18, 2009
|
Install Solaris 10 x86 on VMware Workstation 6.5 (Part 2)
 | In this part, I will show you how to prepare VMware settings for Solaris 10. Currently my main OS is Windows XP and I suppose to install the Solaris 10 as guest OS in VMware. This steps is very straight forward and easy to follow. I prepare this VMware setting for Solaris 10 under custom setting, eg: Disk size and Memory size. So that it will be suitable if I want to install application server or database server in Solaris 10.
|
PRE-INSTALLATION
To run the VMware Workstation 6.5, I follow these steps: Start > All Programs > VMware > VMware Workstation.
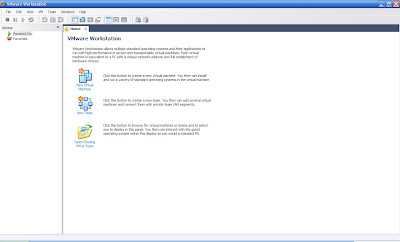 | In this screen, I click New Virtual Machine in the right pane. It will open the popup window, then I choose Typical (recommended), then click Next. |
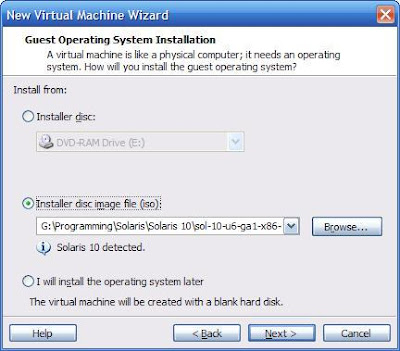 | I click Installer disc image file (iso) option, then I locate the my Solaris 10 ISO file in my local computer. And VMware should detect the Solaris 10 automatically. Then Next. |
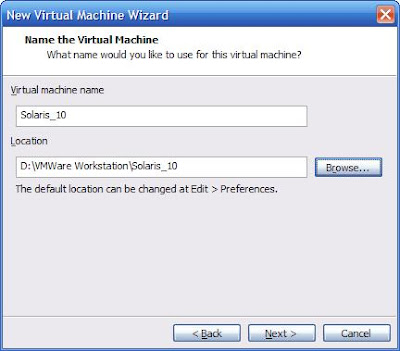 | In the next page, I fill the Virtual machine name and I choose the Location where my the Solaris 10 will be installed. Then I click Next |
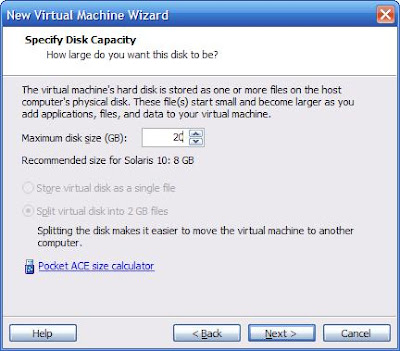 | It will ask me to fill the Maximum Disk Size for my Solaris 10. By default it will choose 8.0 GB, but for my Solaris 10, I choose 20 GB. Then, I click Next |
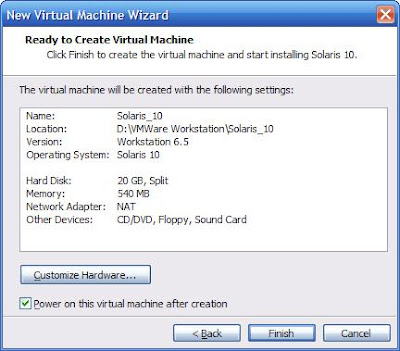 | Here is the summary of my Solaris 10 settings.
Here, I can just click Finish but I won't do that first!
I will change the memory size to 1024 MB instead of only 540 MB (default). Then I click Customize Hardware... button. |
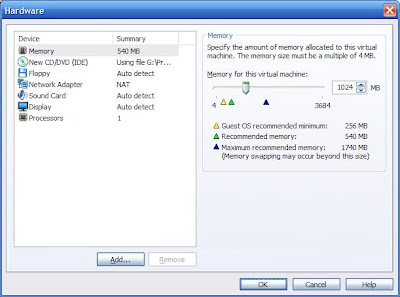 | Then I change the Memory to 1024 MB in the right pane. With changing to higher memory, my Solaris 10 will be running faster, and also it will be suitable if I install other application inside my Solaris 10, like Database Server or Application Server.
Then I click OK.
It will come back to the previous screen, then I click Finish. |
Until here the preparation is finished, then it will automatically continue to the next step.
Continue to Part 3...


0 comments
Post a Comment